This project was so much fun. I’m so glad I did it. That being said, I doubt I’d ever do it again. But it’s totally worth it. Here is how we did it and what we learned along the way:
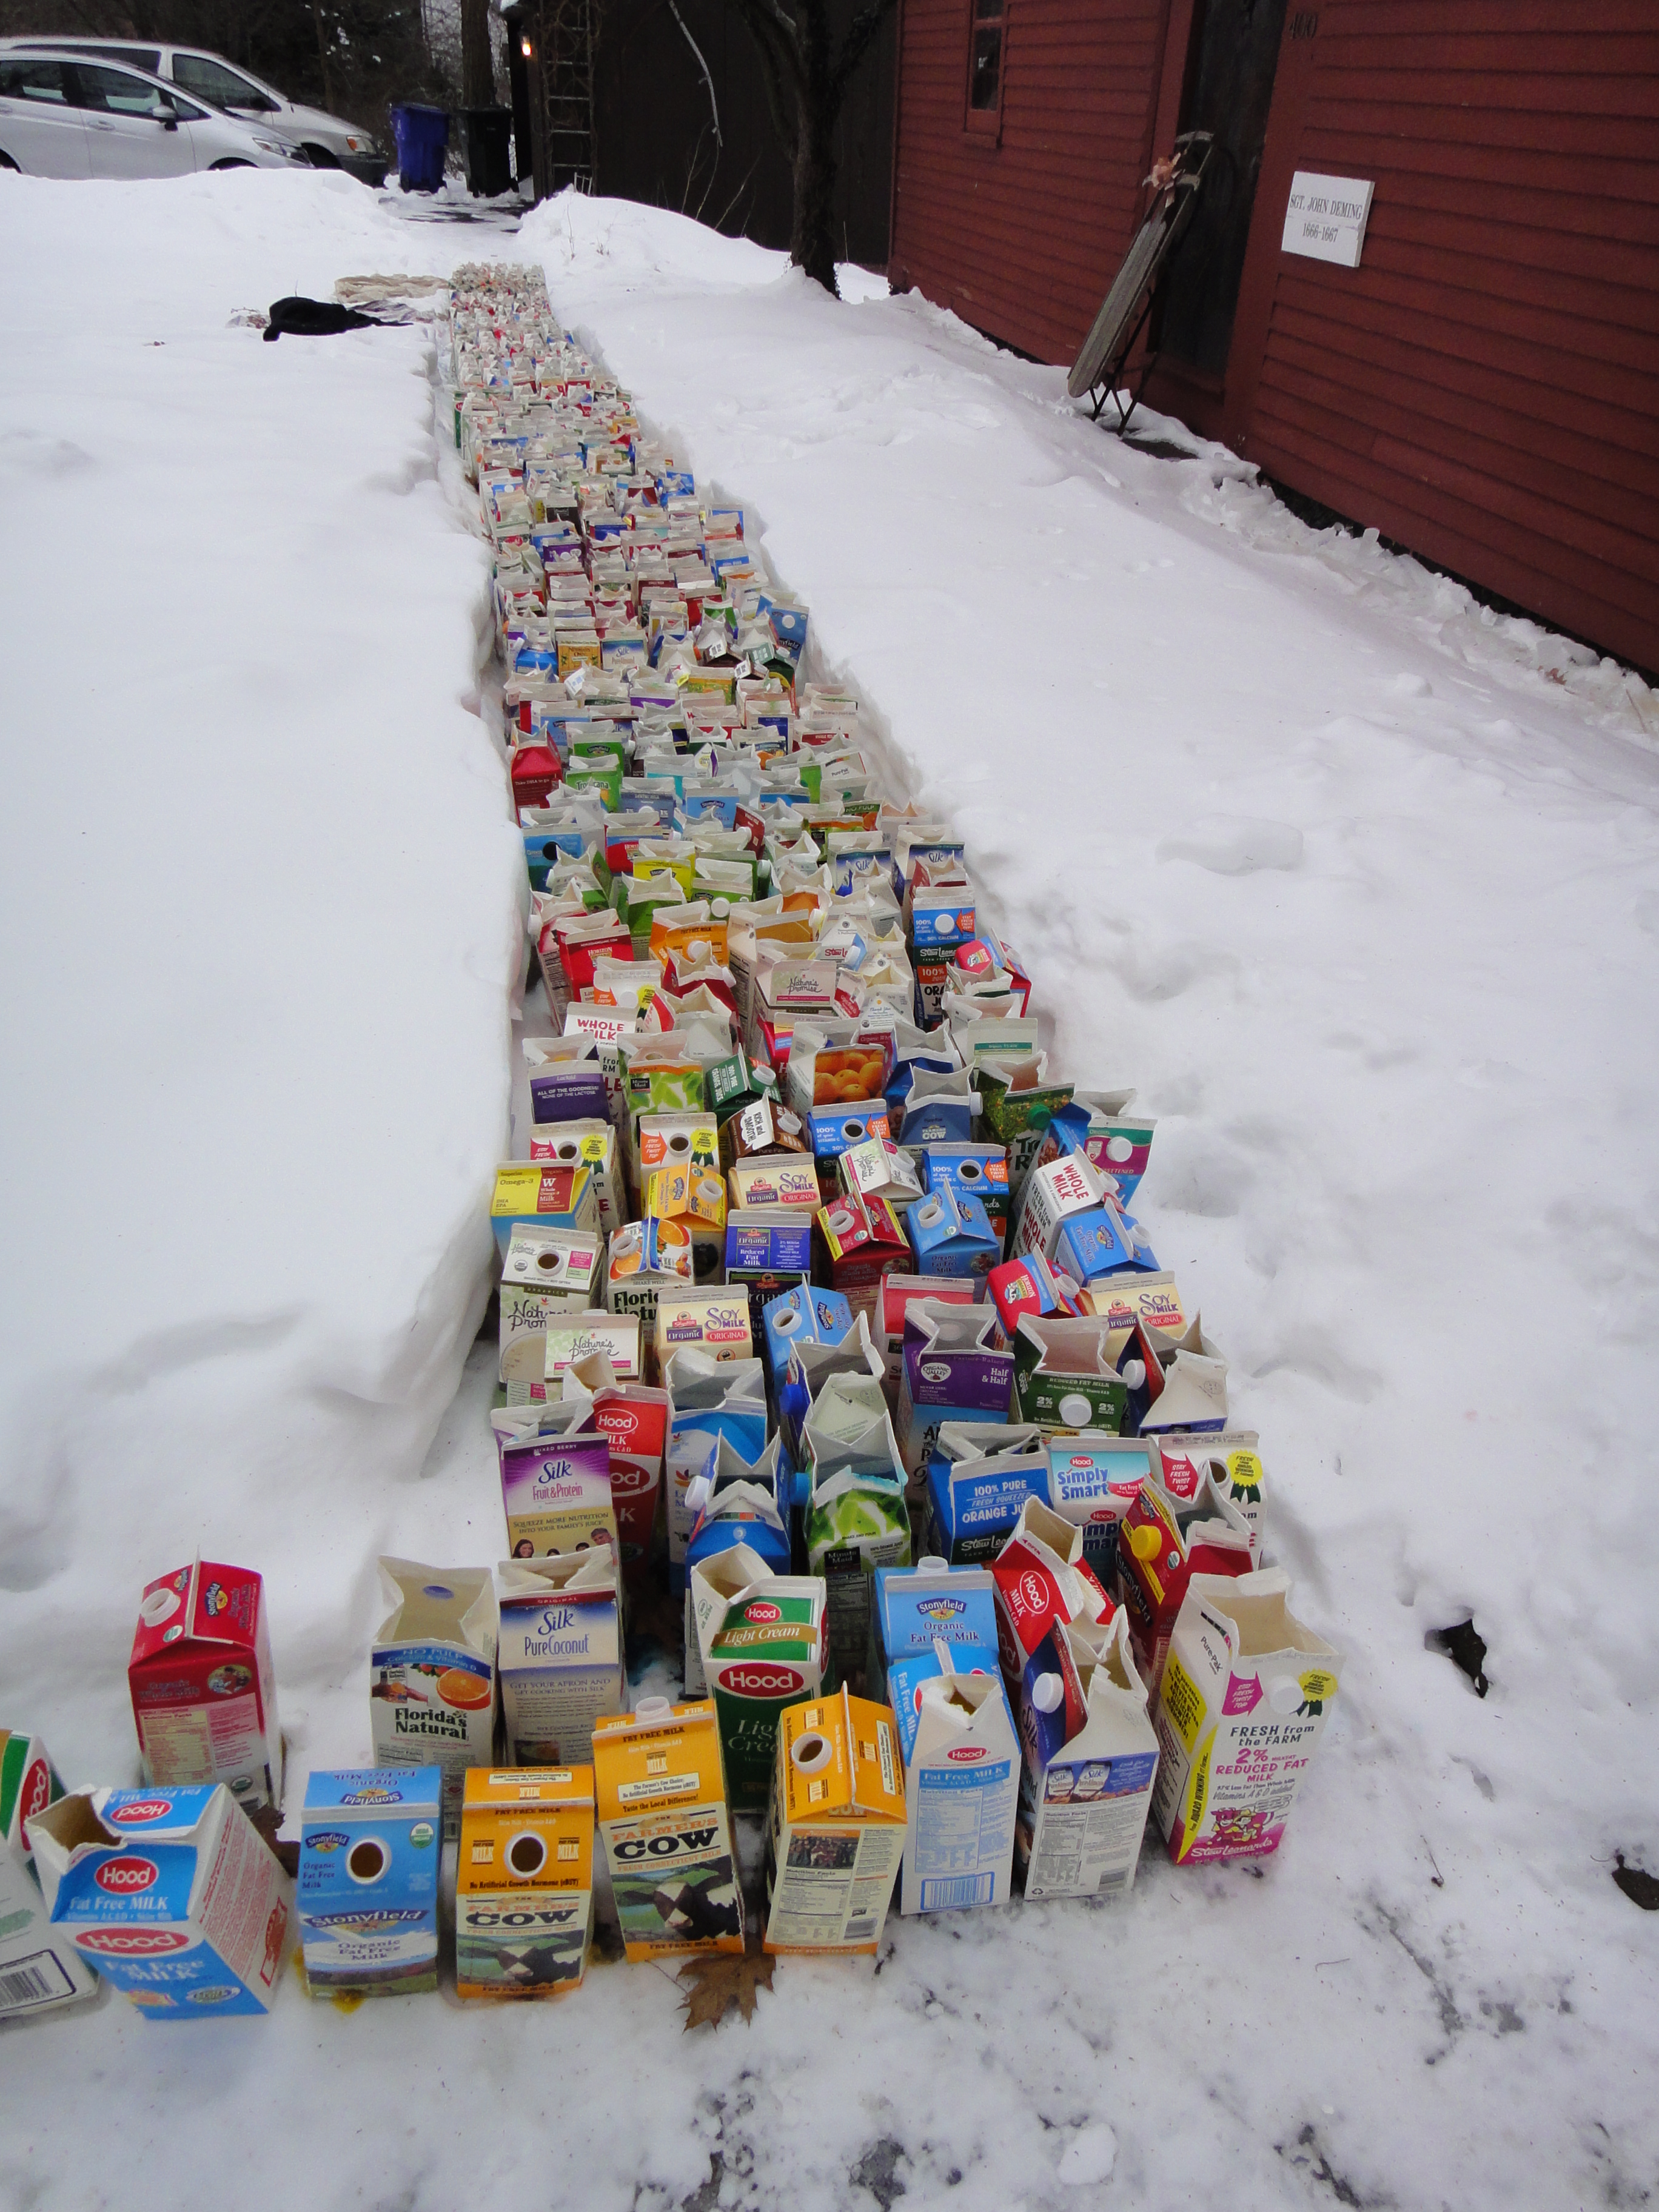
- Collect over 500 half gallon, cardboard containers. If you get about 520 to 530 that should be more than enough with some room for error.
Notes: Fake stuff smells the worst. Year old soy products, coconut milk and lactaid milk smells even worse than year old egg nog. You’ve been warned. Also, most people don’t use half gallons, so get as many people collecting for you as possible. If you think that on trash night you can go recycling bin-to-recycling bin and find half gallons, don’t waste your time. People just don’t use them. Find your friends, family and local businesses that do and ask them to collect them for you.
2. Rinse them out and open the tops.
Notes: I didn’t rinse all of them, which I came to regret. And the ones I opened froze faster and were easier to fill and carry. It’s more work in the beginning, but will pay off in the end.
3. Fill with water and a little food color. Fill to the fold line.
Notes: You will eventually need a few smaller ones so if you make about 15 that are half to three-quarters full, you’ll use them
4. Wait for a combination of snow and freezing temperatures.
5. Leave somewhere level and cold where they can freeze.
500 Cartons Freezing Outside.
Notes: It took our cartons five days to freeze outside. It never got above 25-degrees during the day, some days were just 15-degrees and two nights it was around 0-degrees. Still, we needed more time for some of them. Try to keep space between all the cartons so they can get some air flow and freeze faster.
6. Shovel where you will put the igloo.
7. Measure the circumference, for us that was 127 inches, about 10.58 feet. We measured in the very technical way of putting a block in the center, taking a measuring tape and walking in a circle around the block using the measuring tape to measure.
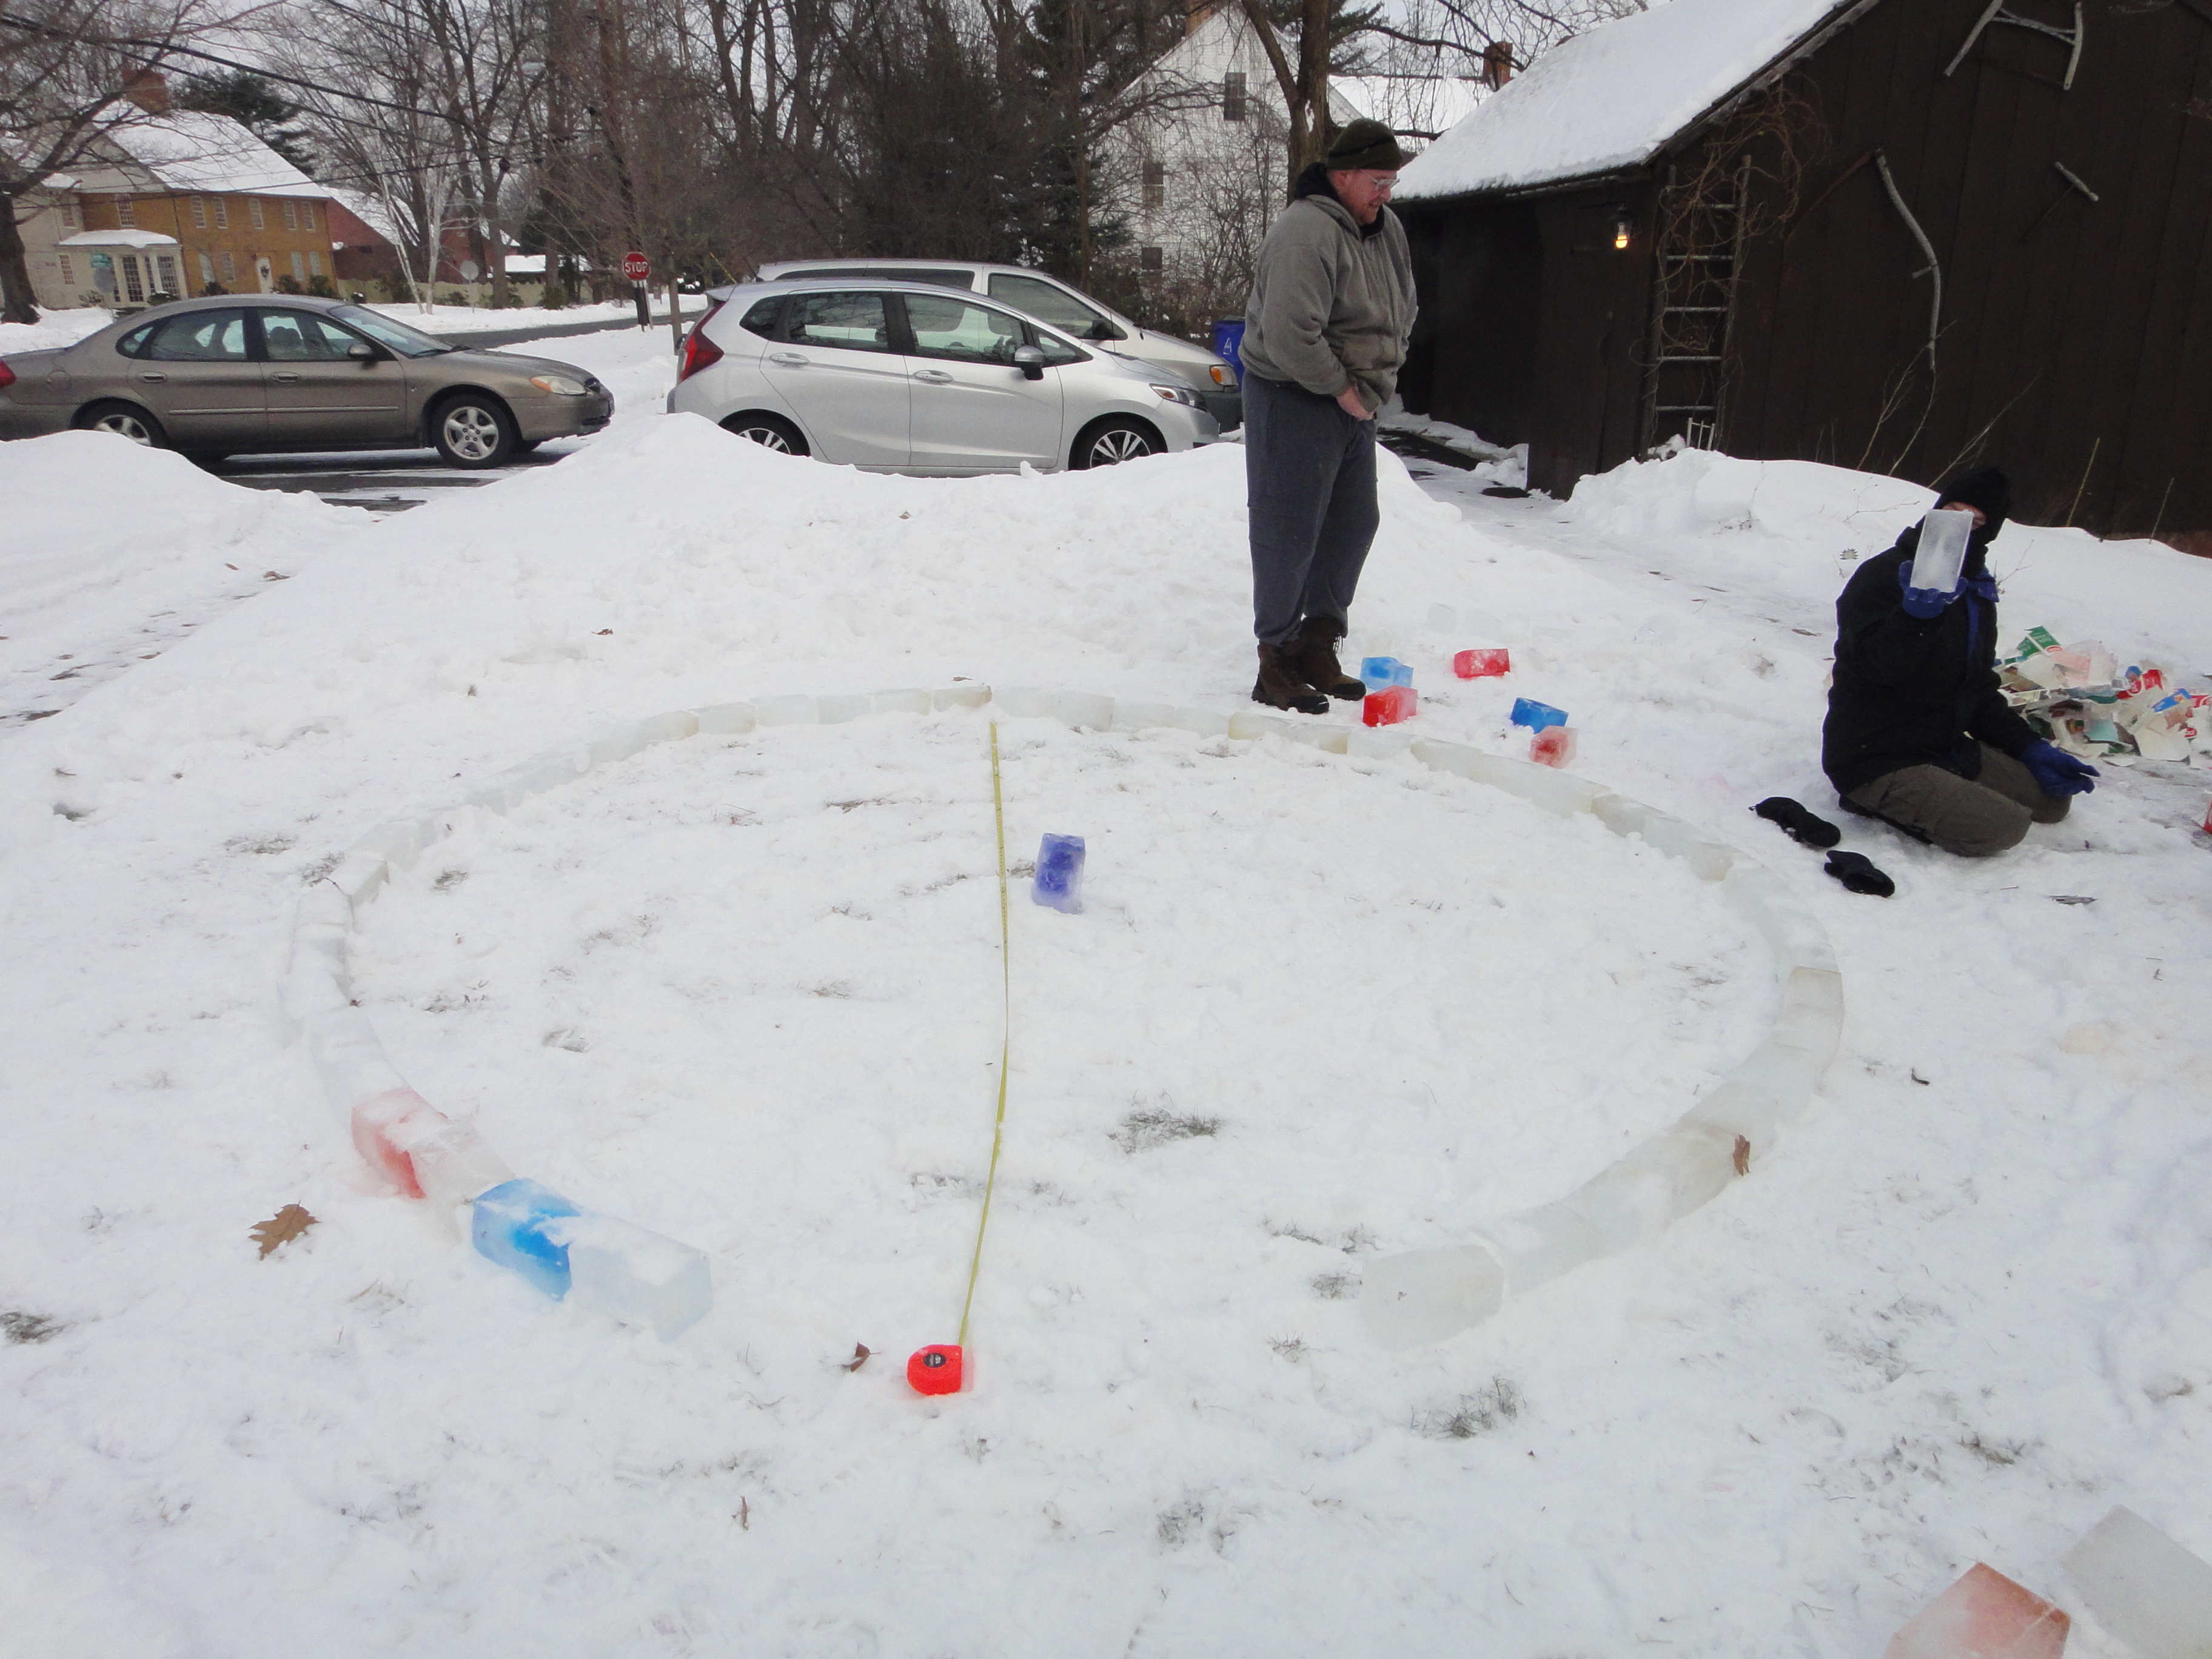
Measuring to make sure we have enough bricks and the right size.
8. The base should be about 47 ice blocks with approximately three blocks of empty space for the entrance.
Notes: At this point, you may want to lie down and make sure your entrance is wide enough for your largest person’s shoulders. Make any adjustments you may need.
9. Mix water and snow to create a slushy mix, or as Matt likes to call it, a slurry.
10. Slap the slurry on your first layer of brick, going brick by brick and trying to offset the bricks so that the brick on top covers half of two bricks below—continue for multiple levels. You’ll only decrease by a couple of bricks each course. Don’t fret. You shouldn’t run out of bricks if you have over 500.
11. As you reach the entry way, start to stack the bricks, leading out of the entrance like a zipper. You only need to do the ones that are attached to the circle of the igloo for now.
12. Repeat steps 10 and 11 until you’re reach about course six or seven, when you’ll need to complete the entryway of your arch.
13. Pile the entrance with packed snow. Lay out your ice blocks as best as possible to make a smooth arch. Then brick-by-brick- use the mortar to construct the arch.
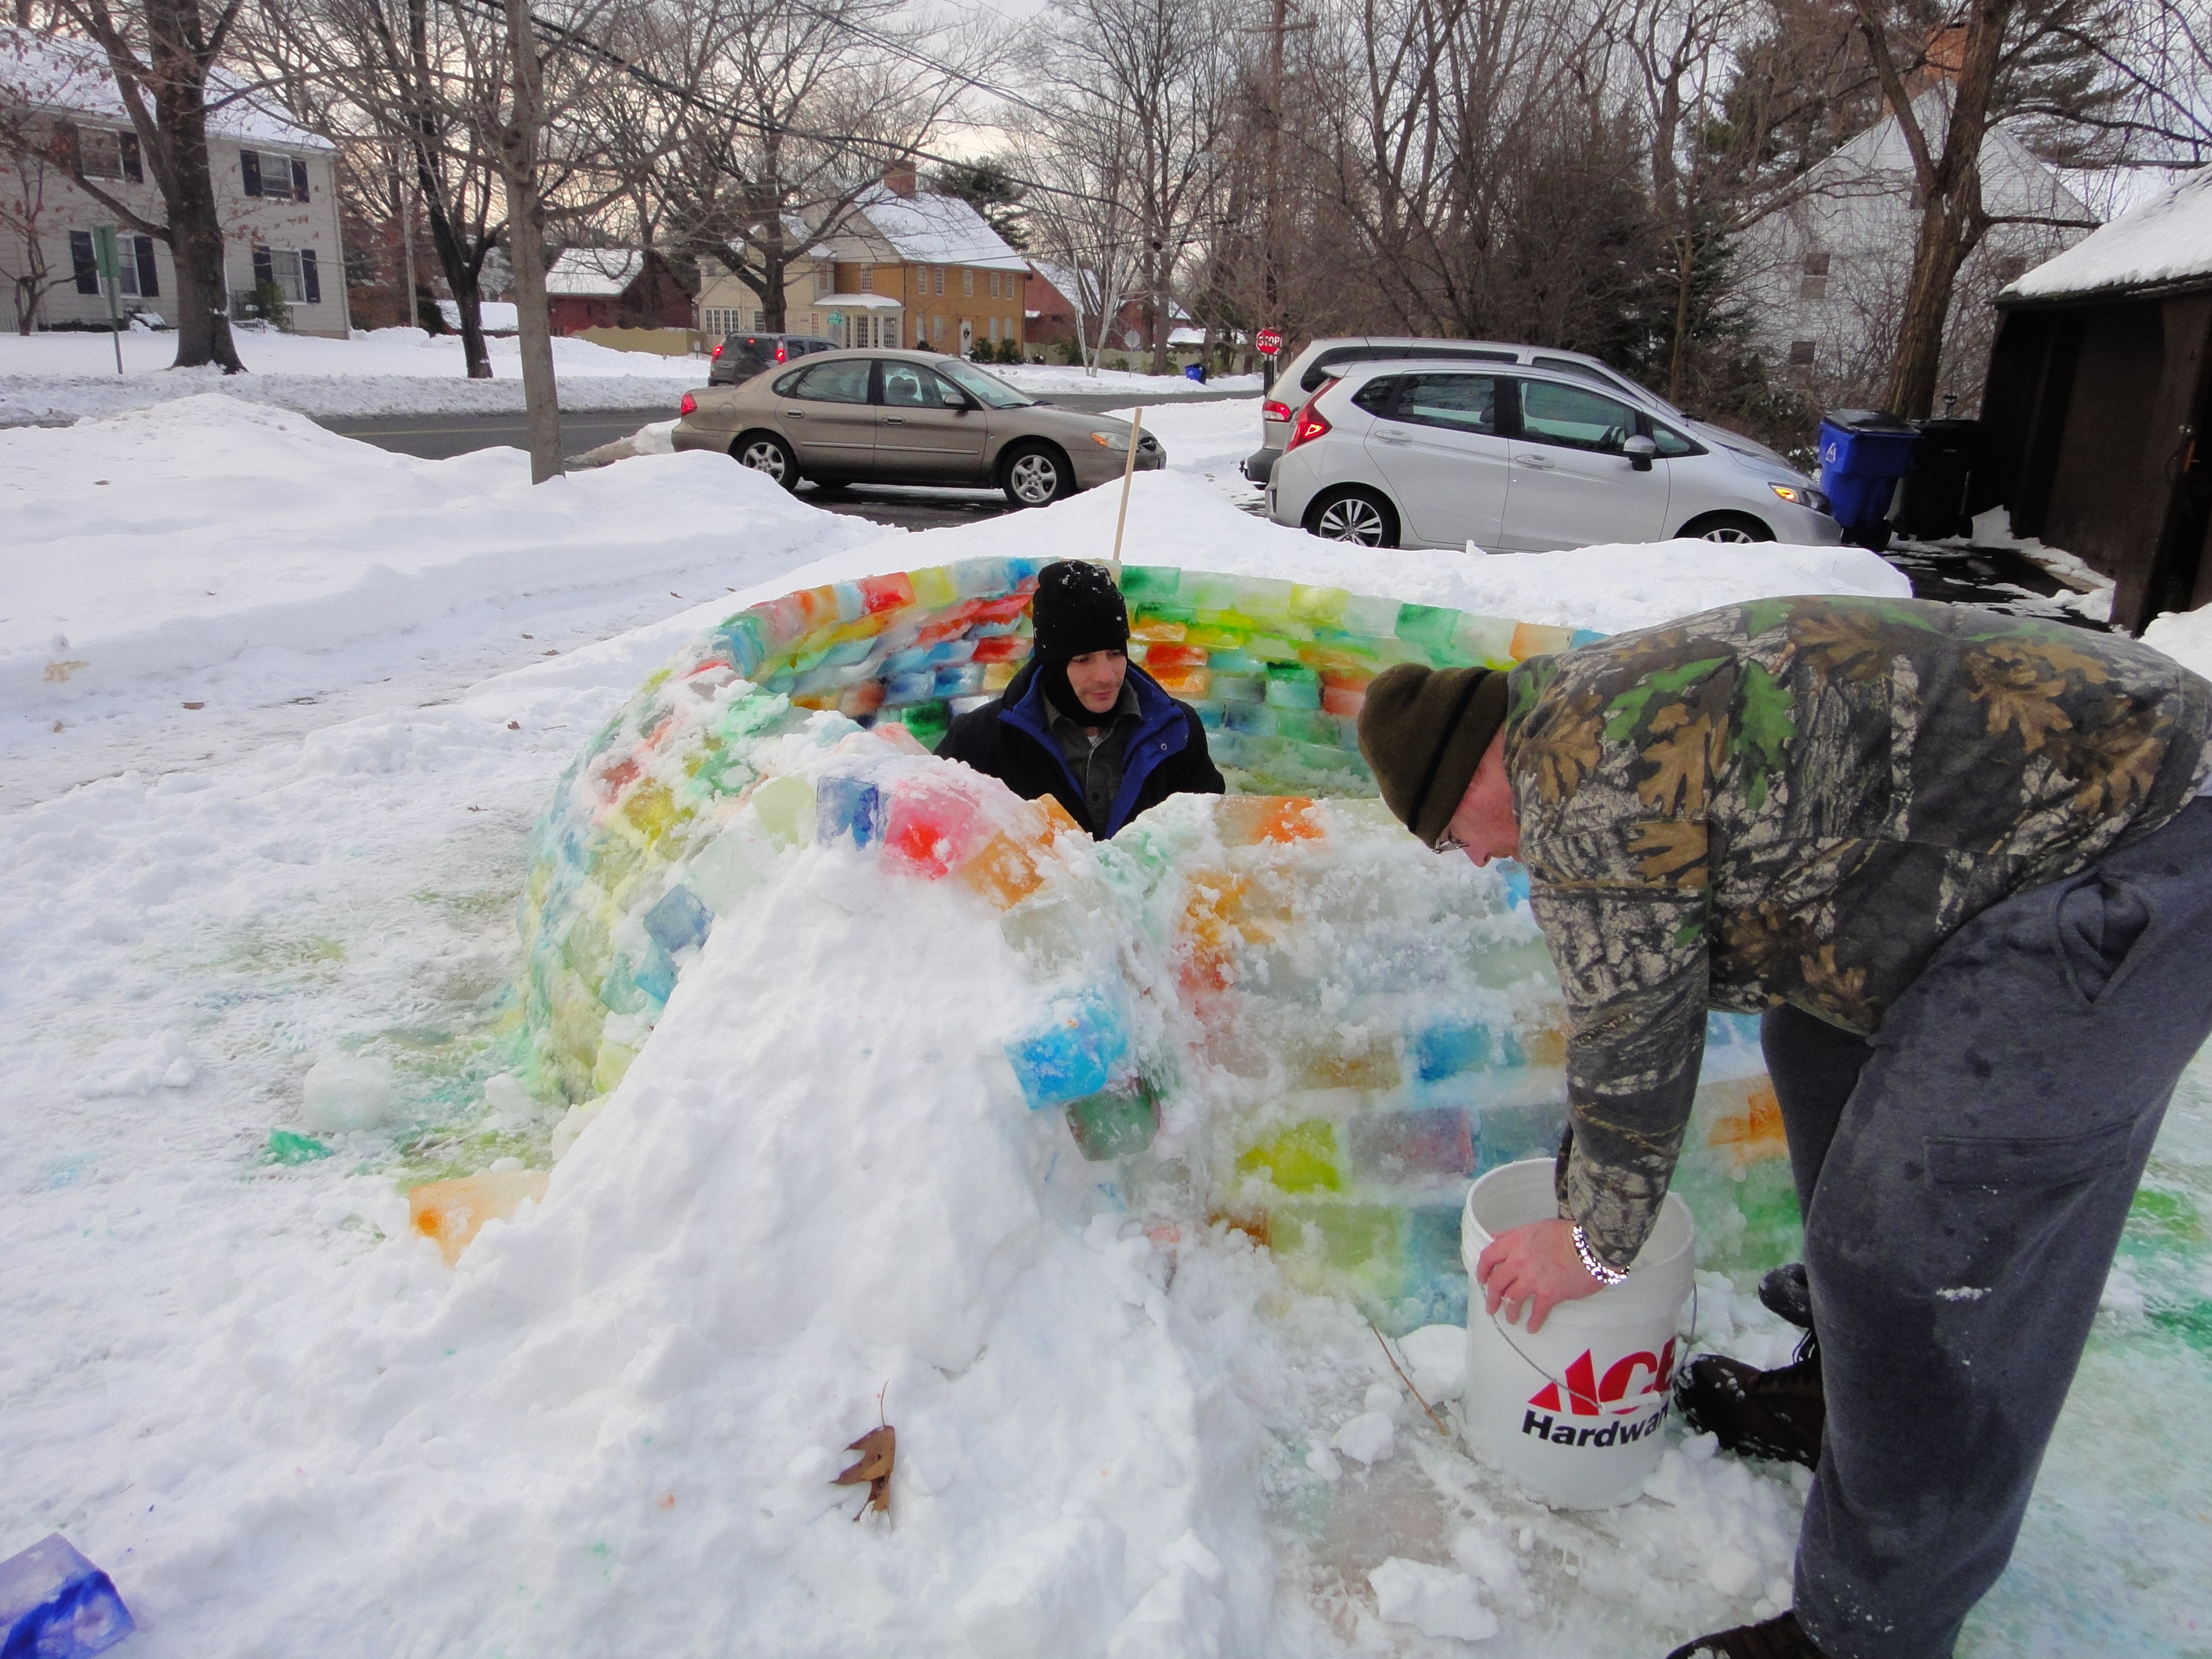
After one failed arch attempt, we used snow to help get it right.
Notes: Do the best you can. Getting the arch was the hardest part of us, but structurally it’s what will keep it all together. So take your time. We made it work without a “keystone” brick. Good luck. I’m still amazed this part actually worked.
14. Continue with courses.
15. By course ten you should be safe to dig your snow pack out of the entryway.
16. The total igloo should have about 17 courses. The last few get tricky. Try to fit the bricks as best you can, breaking them if needed to fit.
17. Put the last brick in.
18. Light it and enjoy.
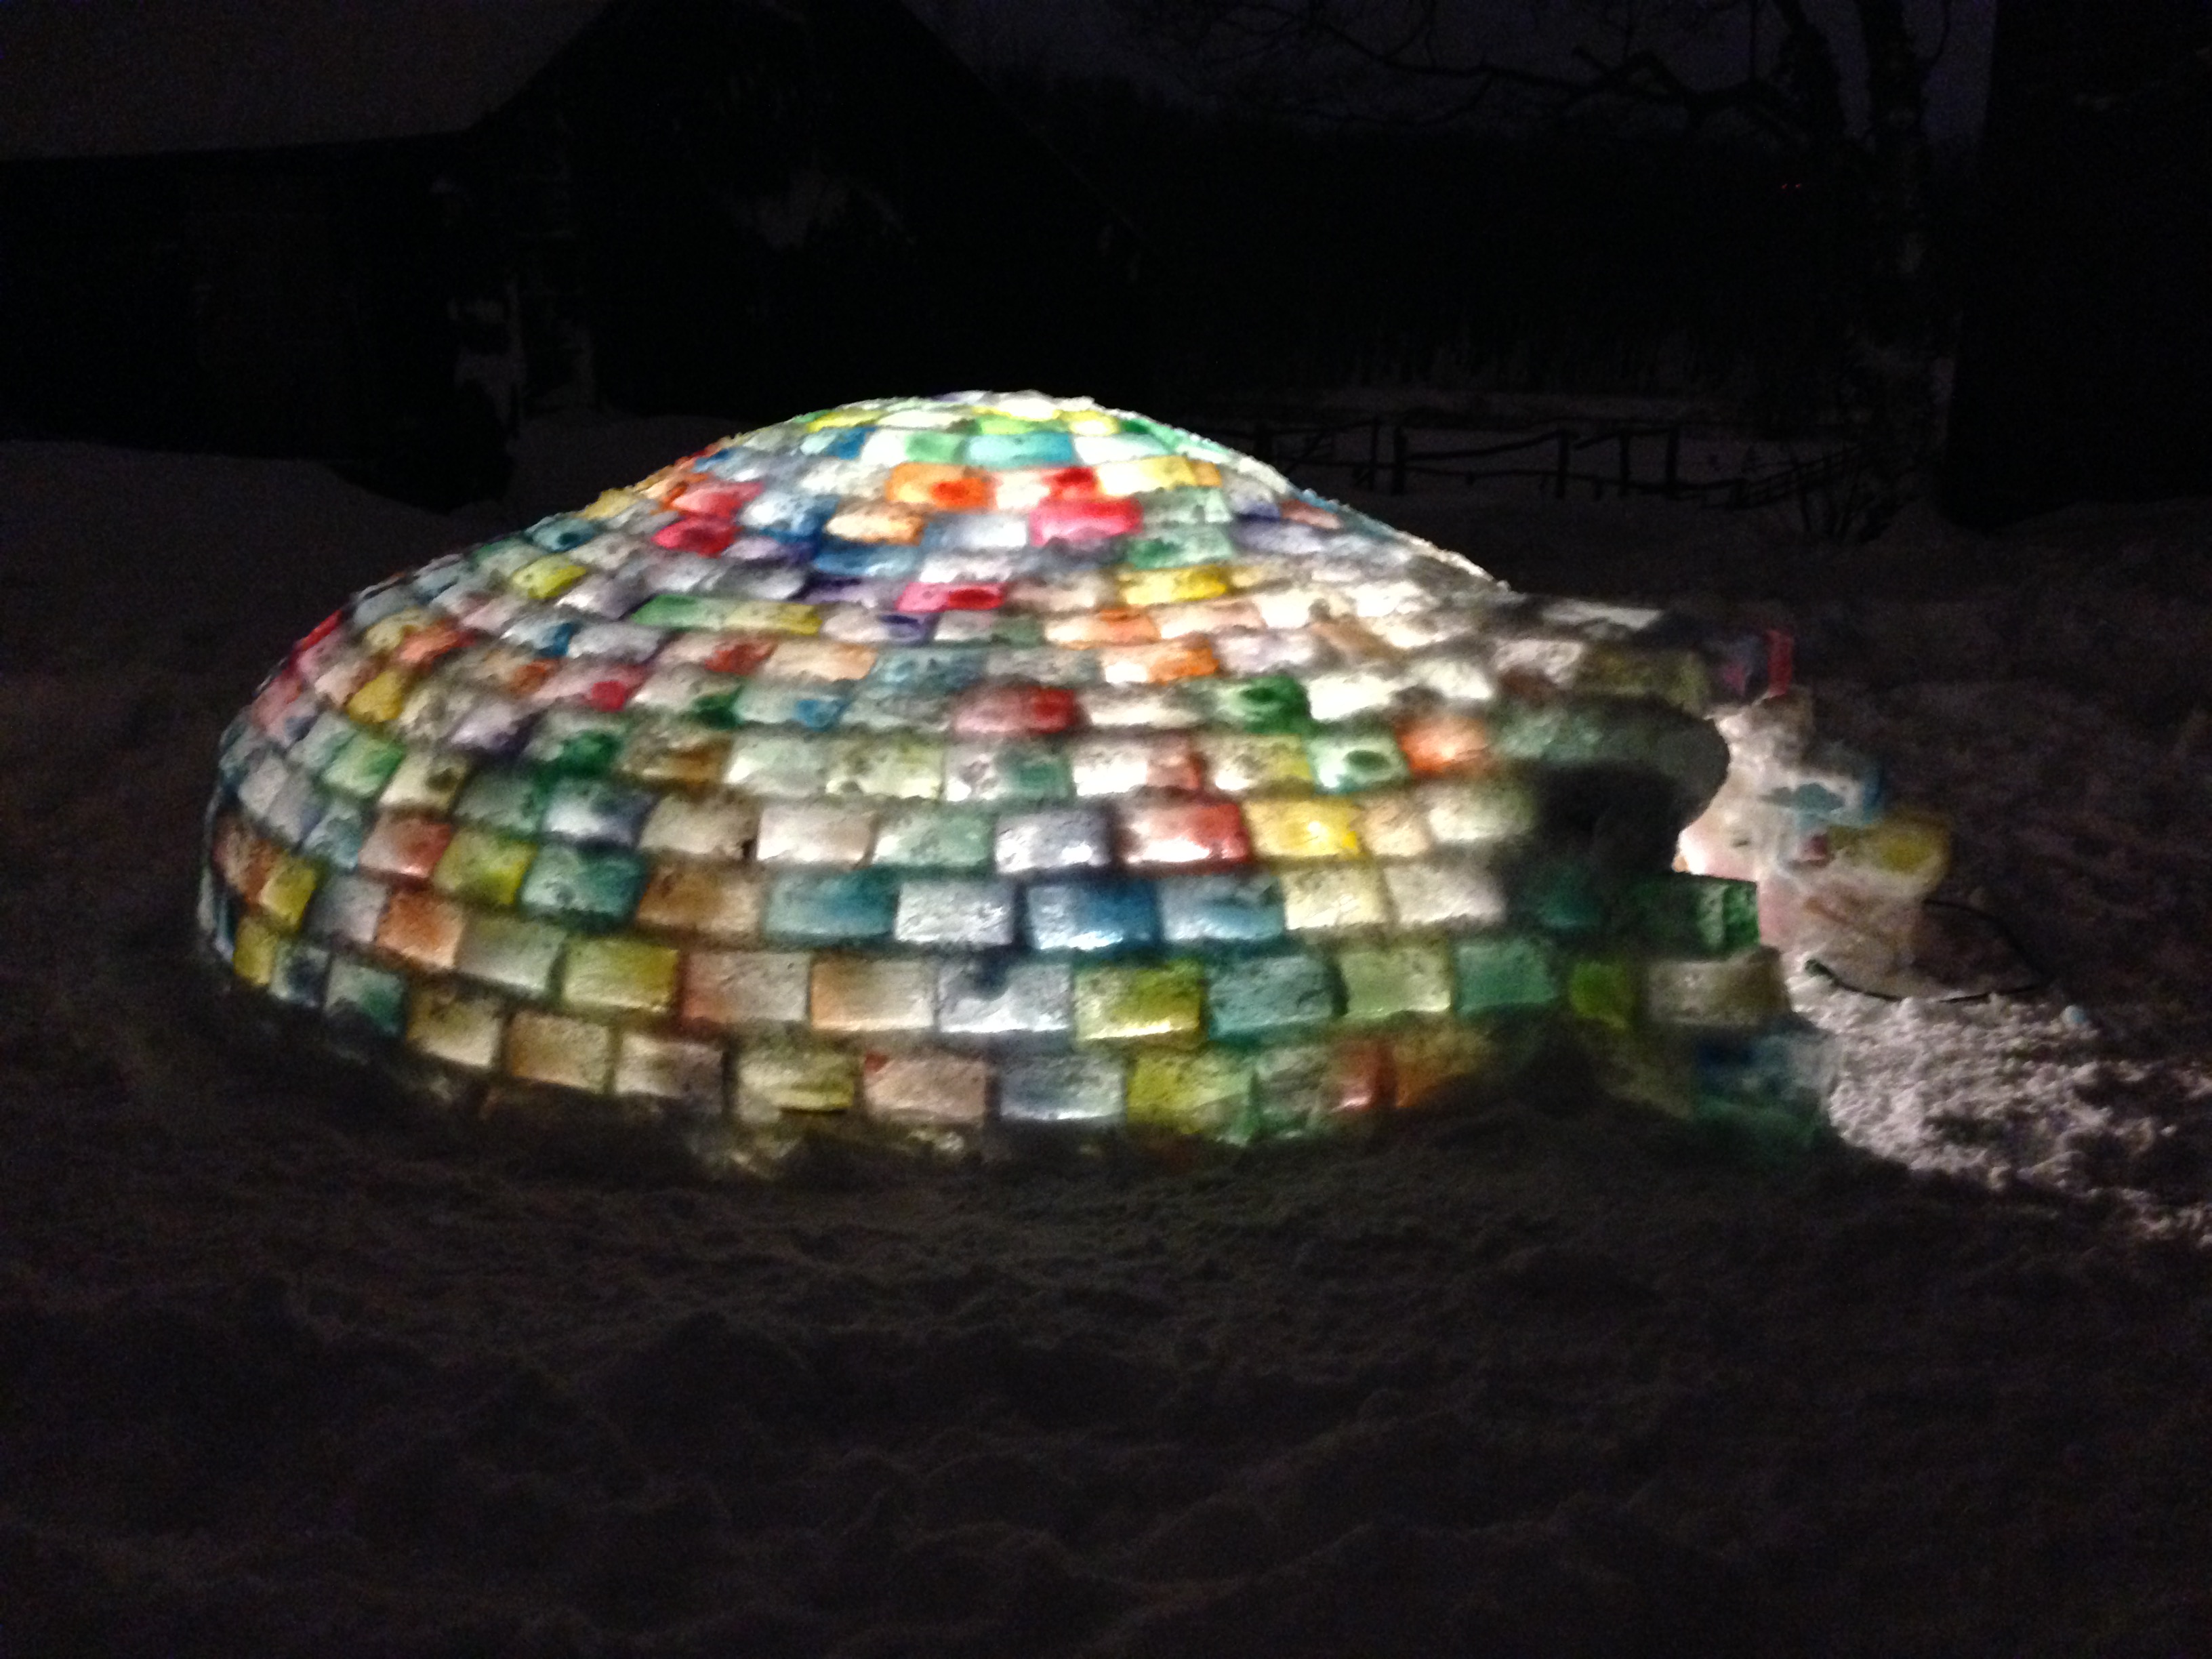
This will make it all worth it and it won’t get old to look at.
19. Hope the cold continues so it lasts a little while.
20. Smile. You just made an igloo to brighten the winter.
You can build out the entrance if you have more bricks. And check out the video of our igloo on CT WFSB or click here to see more.